How to Connect a Karaoke Machine to a TV: 4 Methods Step by Step
How to Connect a Karaoke Machine to a TV is our main topic here. When you want to connect karaoke machine to tv units, there are 4 methods: HDMI output (modern TVs, full HD words display), RCA composite (older TVs without HDMI, standard definition), Bluetooth audio (wireless, audio only — no words on screen), and AUX/3.5mm (audio only, basic connection). HDMI is the recommended method for any TV manufactured after 2010. Bluetooth connects audio but does not display words on the TV screen — this is the most important distinction covered in this guide.
For machines that include a built-in screen and optional HDMI output for additional TV mirroring, see the best karaoke machine with screen guide. For a full explanation of screen types and what a built-in display does, see the karaoke machine with screen attribute guide.
How to Connect a Karaoke Machine to a TV: What You Need Before You Connect Karaoke Machine to TV
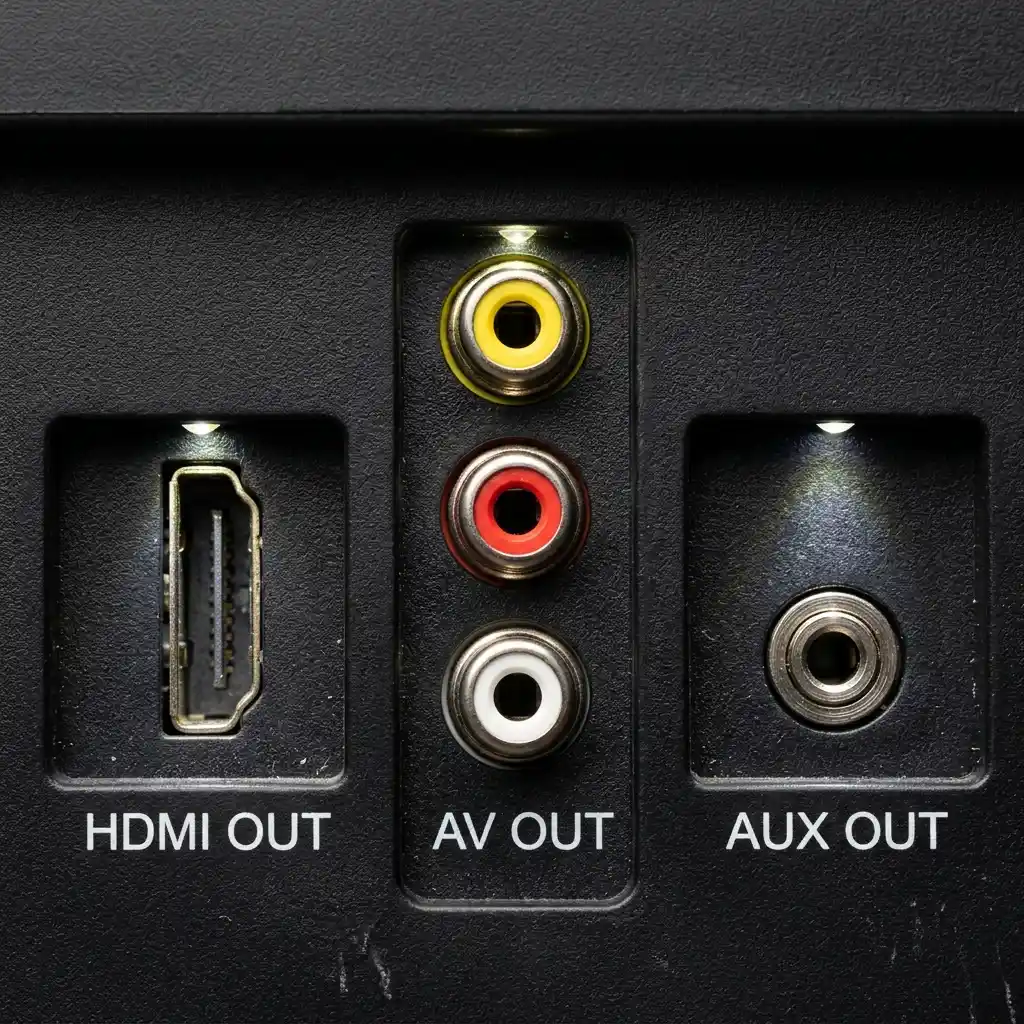
Before connecting a karaoke machine to a TV, confirm 3 things: the output port on the karaoke machine, the matching input port available on the TV, and the correct cable to bridge them.
Identifying the karaoke machine’s output port takes 10 seconds: turn the machine to face away and inspect the rear or side panel. HDMI OUT is a trapezoidal 19-pin port, approximately 13mm wide. AV OUT or RCA OUT is a cluster of 3 circular jacks colour-coded yellow (video), red (right audio), and white (left audio). AUX OUT is a single 3.5mm circular jack, identical in size to a headphone socket.
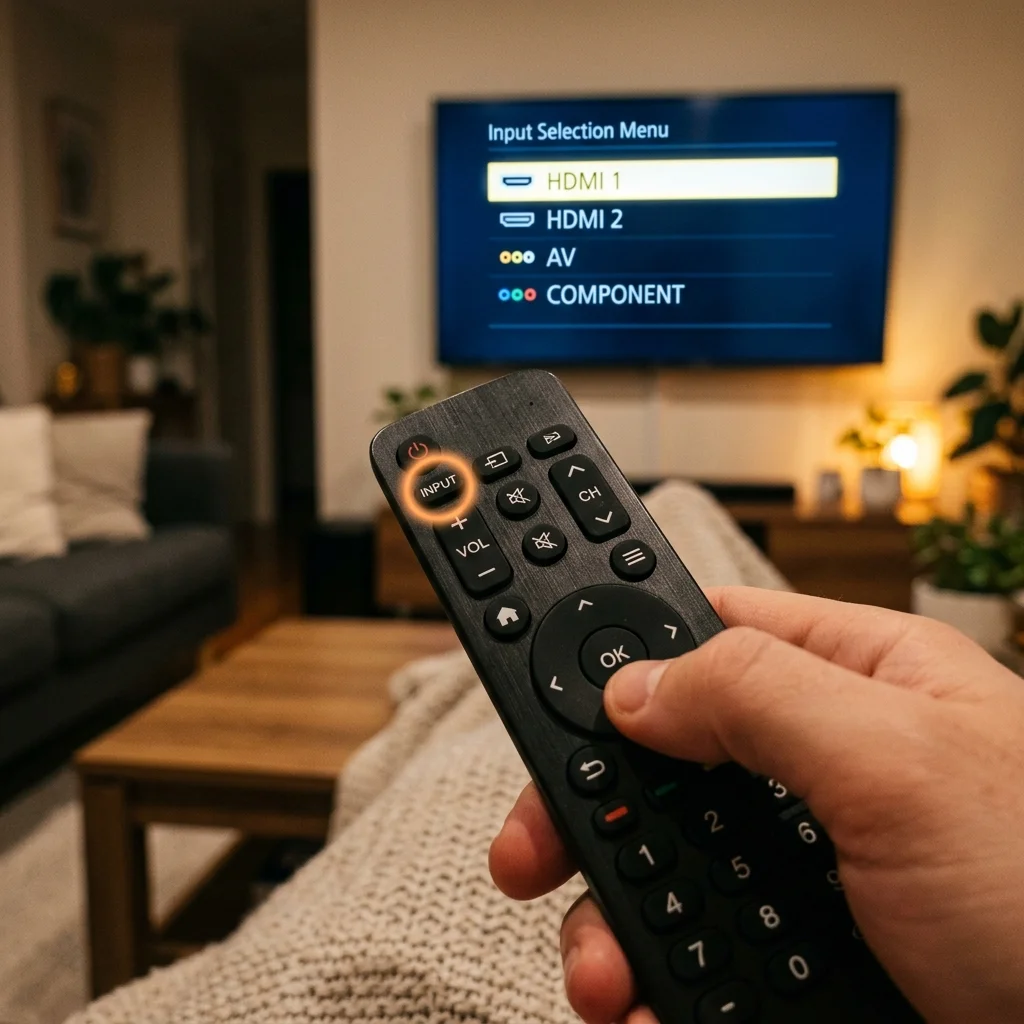
Identifying the TV’s available inputs is equally direct: press the Input or Source button on the TV remote once — most TVs display a menu listing all available ports (HDMI 1, HDMI 2, AV, Component). Note which HDMI number is physically free on the back of the TV before connecting.
3 combinations to confirm before buying a cable:
Karaoke machine HDMI OUT → TV HDMI IN: use a standard HDMI cable (type A to type A)
Karaoke machine RCA/AV OUT → TV AV IN: use a 3-connector composite cable (yellow, red, white)
Karaoke machine AUX OUT → TV AUX IN: use a standard 3.5mm stereo audio cable
Both cables are available for under $10. If the karaoke machine has only Bluetooth and the TV has no AUX input, Bluetooth is the only connection option — but it delivers audio only, not words display.
Method 1: HDMI Connection (Recommended for Modern TVs)
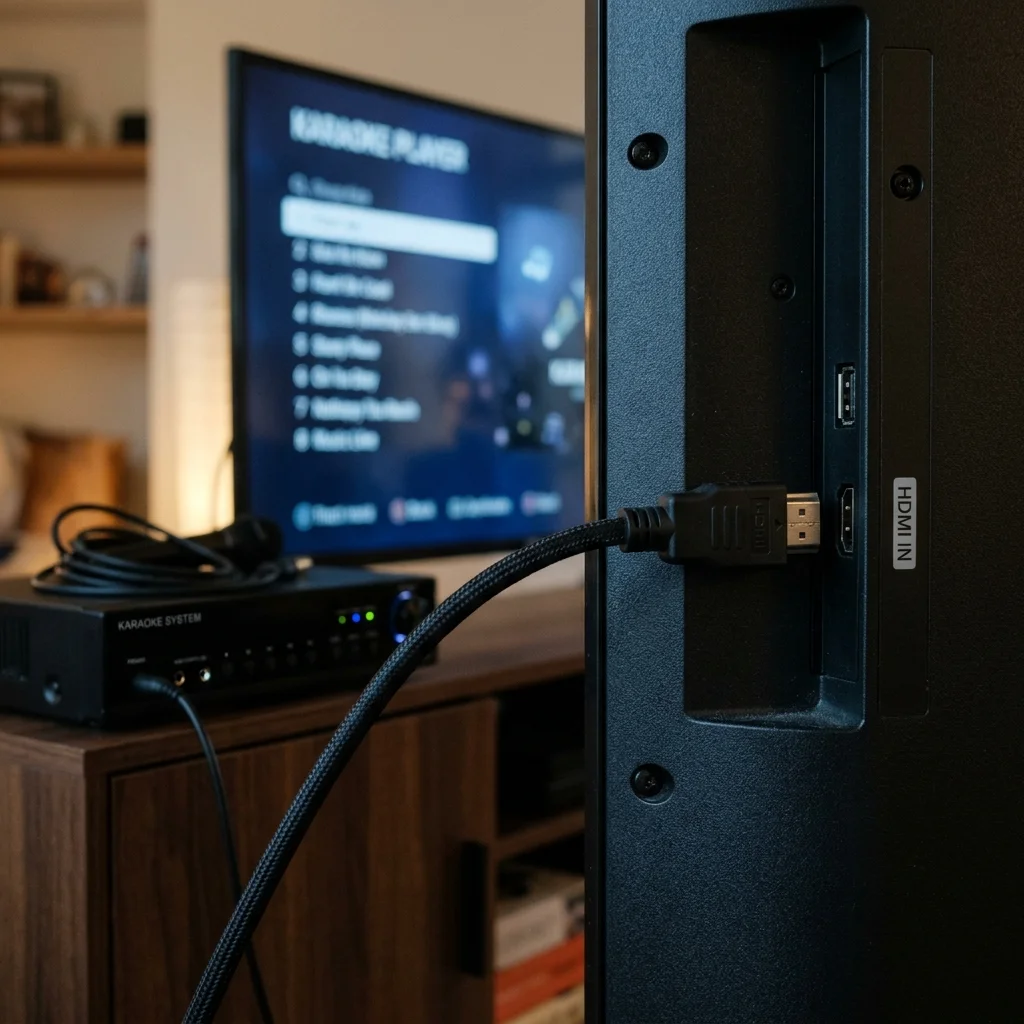
HDMI is the best method to connect a karaoke machine to a TV — it transmits 1080p video and stereo audio in a single cable, displays words in full HD on screen, and adds no audio synchronisation delay.
HDMI connection requires the karaoke machine to have an HDMI OUT port. The 4 consumer karaoke machines with confirmed HDMI output are the iKarao Shell S1 (10.1-inch Android, $350–$400), Magic perform E5 (7-inch screen, $200–$250), Acesonic DGX-220 (7-inch, $150–$200), and Sonken SD-40 (10-inch, $250–$300). JBL EventBox machines do not include HDMI output on any current model.
HDMI Setup — 5 Steps
Step 1: Power off both the karaoke machine and the TV before connecting cables.
Step 2: Connect one end of the HDMI cable to the HDMI OUT port on the karaoke machine. The connector inserts in one orientation only and clicks audibly when fully seated.
Step 3: Connect the other end of the HDMI cable to any HDMI IN port on the TV. Note the number of the port used (HDMI 1, 2, or 3 — printed beside the port on the TV).
Step 4: Power on the TV first, then the karaoke machine.
Step 5: Press Input or Source on the TV remote and select the HDMI port number used in Step 3. The karaoke machine’s interface or words display appears on screen within 5–10 seconds.
HDMI vs RCA: Which Produces Better Karaoke Words?
HDMI delivers 1080p resolution — individual characters in words measure approximately 20–25mm tall on a 55-inch TV at 10-foot viewing distance, sharp and fully anti-aliased. RCA composite delivers 480i standard definition — characters are visibly softer at the same distance.
For any TV manufactured after 2010 with HDMI inputs available, HDMI is the correct choice. RCA produces acceptable words legibility for viewing distances under 8 feet but becomes noticeably blurry on screens above 40 inches at 10 feet. Use RCA only if the TV predates 2010 or has no available HDMI inputs.
Method 2: RCA Composite Connection (For Older TVs)
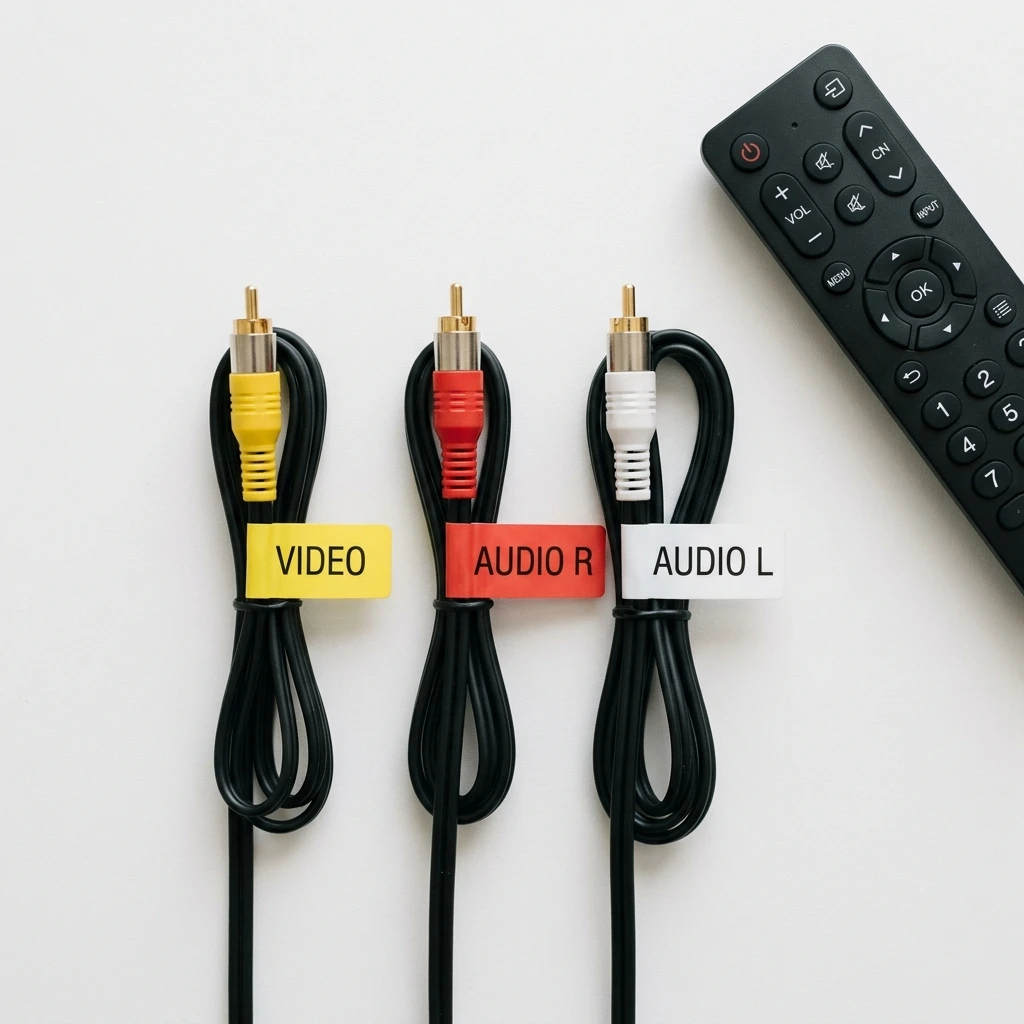
RCA composite is the correct connection method for TVs without HDMI inputs — it uses 3 colour-coded cables (yellow for video, red for right audio, white for left audio) to transmit standard-definition words and audio.
Most karaoke machines include RCA output alongside HDMI or as the primary video output. Machines with confirmed RCA/AV output include the JYX PA9Plus (AV composite out), Karaoke Machine SML-385 (RCA out), and VocoPro DA-4000 Pro (RCA). Check for a cluster of 3 circular jacks labelled AV OUT on the rear panel — this is the RCA connection.
RCA Setup — 5 Steps
Step 1: Power off both devices before connecting.
Step 2: Connect the yellow RCA cable to the VIDEO OUT (yellow) jack on the karaoke machine. Connect the red cable to AUDIO OUT R (red) and the white cable to AUDIO OUT L (white).
Step 3: Connect the opposite ends of each cable to the matching AV IN jacks on the TV — yellow to VIDEO IN, red to AUDIO IN R, white to AUDIO IN L. Check that the yellow cable is in the VIDEO IN jack, not the Component Y jack — both are yellow on some TVs but carry different signal formats.
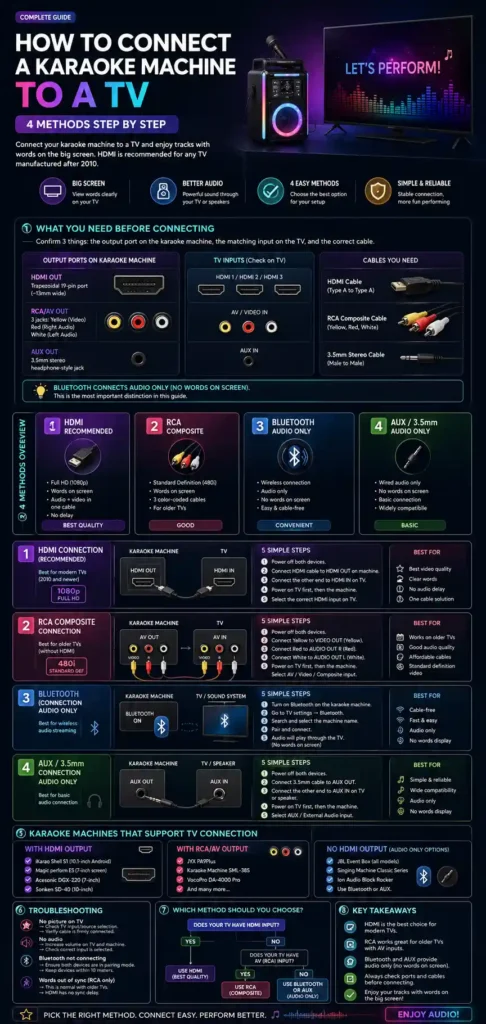
Step 4: Power on the TV first, then the karaoke machine.
Step 5: Press Input or Source on the TV remote and select AV, Video, or Composite — the label varies by TV brand. The karaoke machine interface appears in standard definition.
The RCA connection delivers identical audio quality to HDMI. The only difference is video resolution: 480i standard definition on RCA versus 1080p on HDMI.
Method 3: Bluetooth Connection to TV — Audio Only
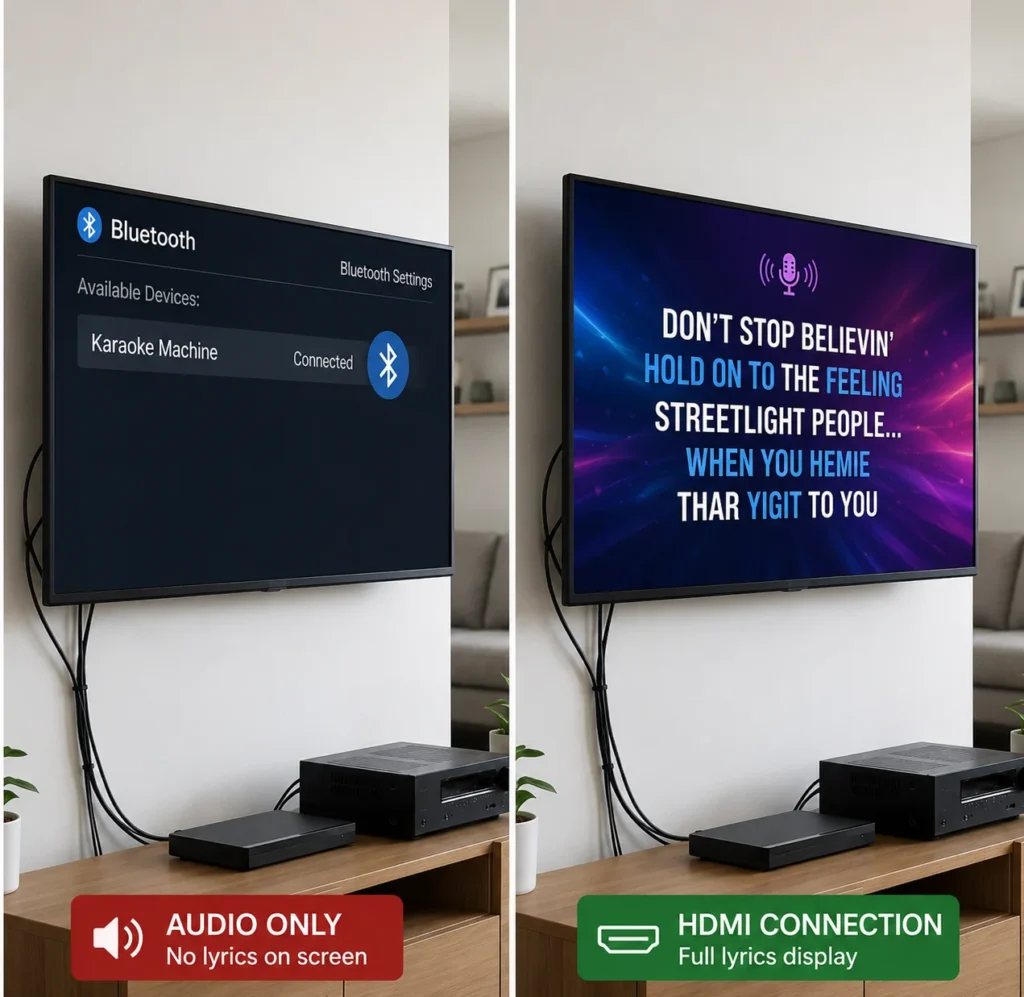
Connecting a karaoke machine to a TV via Bluetooth transmits audio only — words do not appear on the TV screen. Bluetooth is an audio protocol; it carries no video signal.
This is the most important statement in this guide. Many karaoke machine owners connect via Bluetooth expecting to see words on their TV screen. The TV pairs with the karaoke machine as a Bluetooth speaker, routes its internal audio through the machine’s speakers or the TV’s speakers depending on the audio output setting, and displays nothing karaoke-related on the TV panel. The words remain visible only on the karaoke machine’s built-in screen (if present) or on the connected phone screen.
The correct use case for Bluetooth TV connection is audio routing only: sending sound from a phone’s karaoke app through the TV’s speakers at higher volume while viewing words on the phone screen. For machines like the JBL karaoke machine EventBox line, which have no HDMI or RCA output, Bluetooth to TV is the only available connection method.
Bluetooth Setup — 4 Steps
Step 1: On the TV, open Settings → Sound → Sound Output and set the output device to search for Bluetooth devices. The exact menu path varies by TV brand: Samsung uses Settings → Sound → Sound Output → Bluetooth Speaker List; LG uses Settings → Sound → Bluetooth Device.
Step 2: On the karaoke machine, activate Bluetooth pairing mode. On most machines, hold the Bluetooth button for 3 seconds until the indicator flashes rapidly.
Step 3: Select the karaoke machine from the TV’s Bluetooth device list and confirm pairing. The connection establishes within 10 seconds on Bluetooth 5.0 devices.
Step 4: Play audio from a karaoke app on a phone. Audio routes through the connection chain. Note: words remain on the phone screen — the TV displays no words.
Bluetooth connections add 40–150ms of audio latency depending on the codec used (standard SBC: 100–150ms; aptX Low Latency: under 40ms). This latency creates a perceptible delay between the performers voice and the backing track through the TV speakers. For karaoke use with Bluetooth, position the performer microphone input through the karaoke machine’s own speaker, not the TV’s Bluetooth output, to avoid the echo effect.
Method 4: AUX/3.5mm Connection
An AUX/3.5mm connection transfers stereo audio from the karaoke machine to the TV using a standard 3.5mm cable — it does not transmit video or words, delivering audio-only output equivalent to RCA.
AUX input is present on most modern TVs as a 3.5mm socket, often labelled AUX IN or PC Audio. Use AUX connection when the karaoke machine has no HDMI or RCA output and Bluetooth is unavailable or adds unacceptable latency.
AUX Setup — 3 Steps
Step 1: Connect a 3.5mm stereo audio cable from the AUX OUT jack on the karaoke machine to the AUX IN jack on the TV.
Step 2: On the TV remote, press Input or Source and select AUX or PC as the audio input.
Step 3: Adjust volume balance between the karaoke machine’s speaker and the TV’s speakers to achieve the desired sound level. Most setups use the karaoke machine’s speaker for microphone output and the TV’s AUX input for backing track audio.
AUX connection delivers under 5ms latency — equivalent to HDMI and RCA on a direct wired connection, with no audio sync issues.
Which Karaoke Machines Can Connect to a TV?
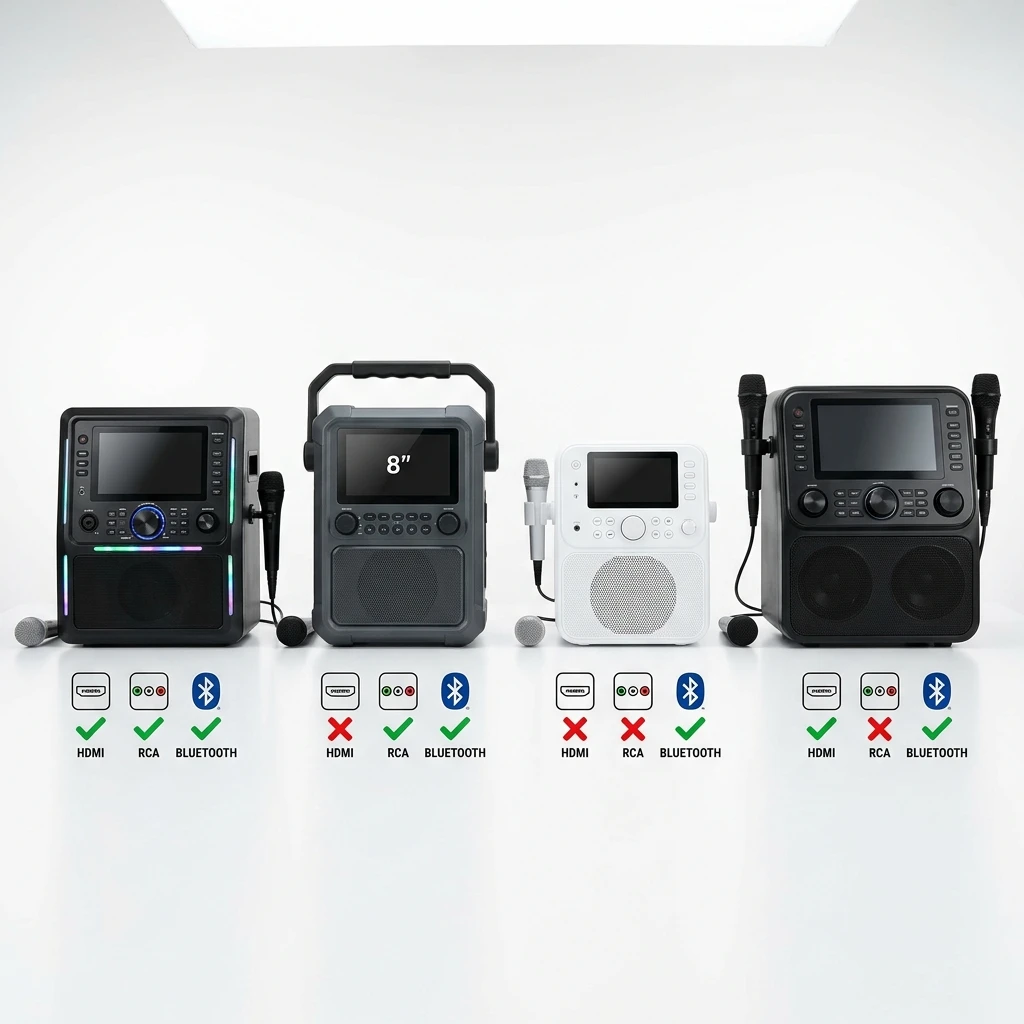
Not all karaoke machines include video output — several popular machines have Bluetooth audio only and cannot display words on a TV screen through any connection method.
For buyers specifically requiring TV words display, the correct purchasing decision is a machine with HDMI or RCA output — not a Bluetooth-only machine. For a full breakdown of machines with built-in screens alongside HDMI output, see the karaoke machine with screen guide.
Troubleshooting: TV Connection Problems
The 3 most common TV connection problems are no picture on the TV, no sound through the TV, and audio lag — words out of sync with the audio.
No Picture on TV
No picture after connecting a karaoke machine via HDMI or RCA has 5 causes, each with a specific fix.
1. Wrong TV input selected. Press Input or Source on the TV remote and cycle through HDMI 1, HDMI 2, HDMI 3, and AV until the karaoke machine interface appears. This resolves the majority of no-picture reports — the connection is correct but the TV is displaying a different input.
2. Cable not fully seated. HDMI connectors click audibly when fully inserted. Disconnect and reconnect both ends of the HDMI cable, pressing firmly until the click is felt. A partially inserted HDMI cable carries no signal.
3. Faulty cable. HDMI cables fail most commonly at the connector ends. Test by replacing the cable with a known-working HDMI cable. Cables under $5 from budget suppliers fail at a higher rate than cables above $8.
4. Wrong HDMI port. Try a different HDMI port on the TV — HDMI 1 instead of HDMI 2. Some TVs have HDCP (content protection) compliance issues on specific ports that prevent certain devices from displaying an image on those ports.
5. RCA yellow cable in wrong socket. On TVs with both composite (RCA) and component inputs, the yellow composite VIDEO jack and the Component Y (green) jack are physically adjacent. Confirm the yellow cable is in the socket labelled VIDEO or COMPOSITE, not the green-labelled Y component jack.
No Sound from Karaoke Machine Through TV
No sound through the TV after connection has 5 causes.
1. TV volume is muted or set to zero. Increase TV volume using the TV remote — TV volume and karaoke machine volume are separate controls.
2. TV audio output is set to an external device. Open TV Settings → Sound → Sound Output and confirm the output is set to TV Speakers, not External Speaker, Soundbar, or Bluetooth. Some TVs automatically route audio to a paired soundbar and produce no sound from the built-in TV speakers.
3. Karaoke machine microphone volume is at zero. The microphone volume and audio (backing track) volume are separate controls on most karaoke machines. Increase the microphone volume using the dedicated mic level control on the machine’s front panel.
4. RCA audio cables swapped. Swapped red and white RCA cables produce mono audio from one channel only — it sounds like one speaker is not working rather than complete silence. Confirm red cable connects to R jacks on both devices and white to L jacks.
5. Bluetooth not fully paired. A Bluetooth connection that shows as paired but produces no sound indicates an incomplete connection. Disconnect and re-pair: on the TV, forget the device from the Bluetooth list, then pair again from scratch following the 4 steps in Method 3.
Audio Lag — Words Out of Sync with Audio
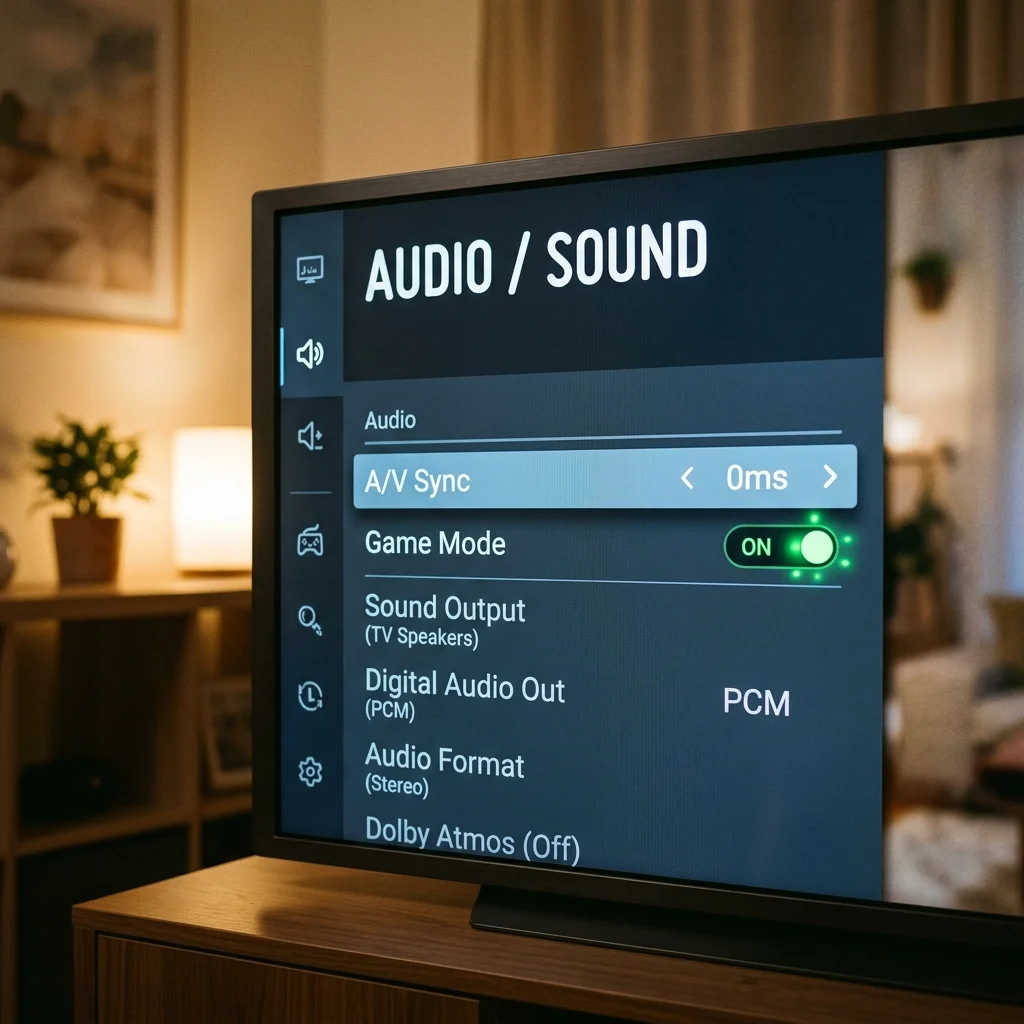
Audio lag causes the TV’s speakers to delay behind the performing— creating an echo effect that makes karaoke performance difficult. The fix involves 4 adjustments in sequence.
1. Set TV A/V Sync to 0ms. Open TV Settings → Sound → A/V Sync or Audio Delay and reduce the value to 0ms or the minimum available. Some TVs add a fixed audio delay for lip-sync compensation with external video sources — this setting overrides that delay.
2. Enable Game Mode on the TV. Game Mode bypasses the TV’s internal image and audio processing pipeline, reducing total display latency from 80–120ms (standard processing) to under 10ms. Access via Settings → General → Game Mode (Samsung), Settings → Picture → Additional Settings → Game Mode (LG), or Settings → Display & Sound → Picture Mode → Game (Sony).
3. Switch from Bluetooth to HDMI or RCA. Bluetooth connections add 40–150ms of unavoidable audio latency due to wireless encoding/decoding. HDMI and RCA wired connections deliver under 5ms latency — a 10× to 30× reduction. If Bluetooth is causing sync problems, wired connection is the permanent solution.
4. Check the karaoke machine’s internal delay setting. Some karaoke machines include an audio delay control on the front panel or in the settings menu to compensate for connected display lag. Set this to 0ms unless the TV’s own processing delay is confirmed and cannot be disabled.
For the setup page on microphone connections and troubleshooting microphone audio specifically, see the karaoke machine microphone setup guide.